Sometimes you just have to go off the rez (in a fun exploratory way).
Ultimaker 3D printers usually print 3D files sliced using the Ultimaker Cura slicer software. Cura has more user exposed settings accessible through the GUI compared to Slic3r forks such as PrusaSlicer and Bambu Studio.
Cura can “repair” small non-manifold holes in 3D models and generate printer G-code that prints as the user intended. Cura is great for most use cases, but sometimes it fails to slice large, detailed dual object files that are already manifold.
Manifold - A collection of points forming a certain kind of set, such as those of a topologically closed surface or an analog of this in three or more dimensions.
In these rare cases, PrusaSlicer or Bambu Studio tend to have fewer slicing errors because they do not do 3D model repair (model repair in these slicers is provided through Microsoft 3D Builder). The drawback is that sliced non-manifold models in Slic3r forks look okay at first glance but have missing layers ands and features on closer inspection.
When generating detailed dual color map models, I can check for and fix nonmanifold errors with tools such as Blender. If Cura is unable to slice the manifold model, I may be able to slice it in PrusaSlicer. The newer Ultimaker S-line (S3/S5/S7) printers expect G-code in the default UFP format output by Cura which is compressed G-code with additional metadata. Luckily Ultimaker Cura and S-line printers can still output and process standard G-code with some caveats explained further down.
I Just Want The PrusaSlicer Profile!
You just want to get the PrusaSlicer Ultimaker printer profiles and skip reading about the changes?
- PrusaSlicer with a version ≥ 2.6.0 should automatically detect the new Ultimaker printer profiles when selecting new printer models.
- You can manually download the PrusaSlicer Ultimaker printer profiles from the PrusaSlicer-settings repo here.
The Gcode “error”
I’d like to print the model using the dual material Ultimaker S5/S7 3D printers at my work. As usual the PrusaSlicer generated G-code file is placed on a USB drive and loaded onto the Ultimaker printer.
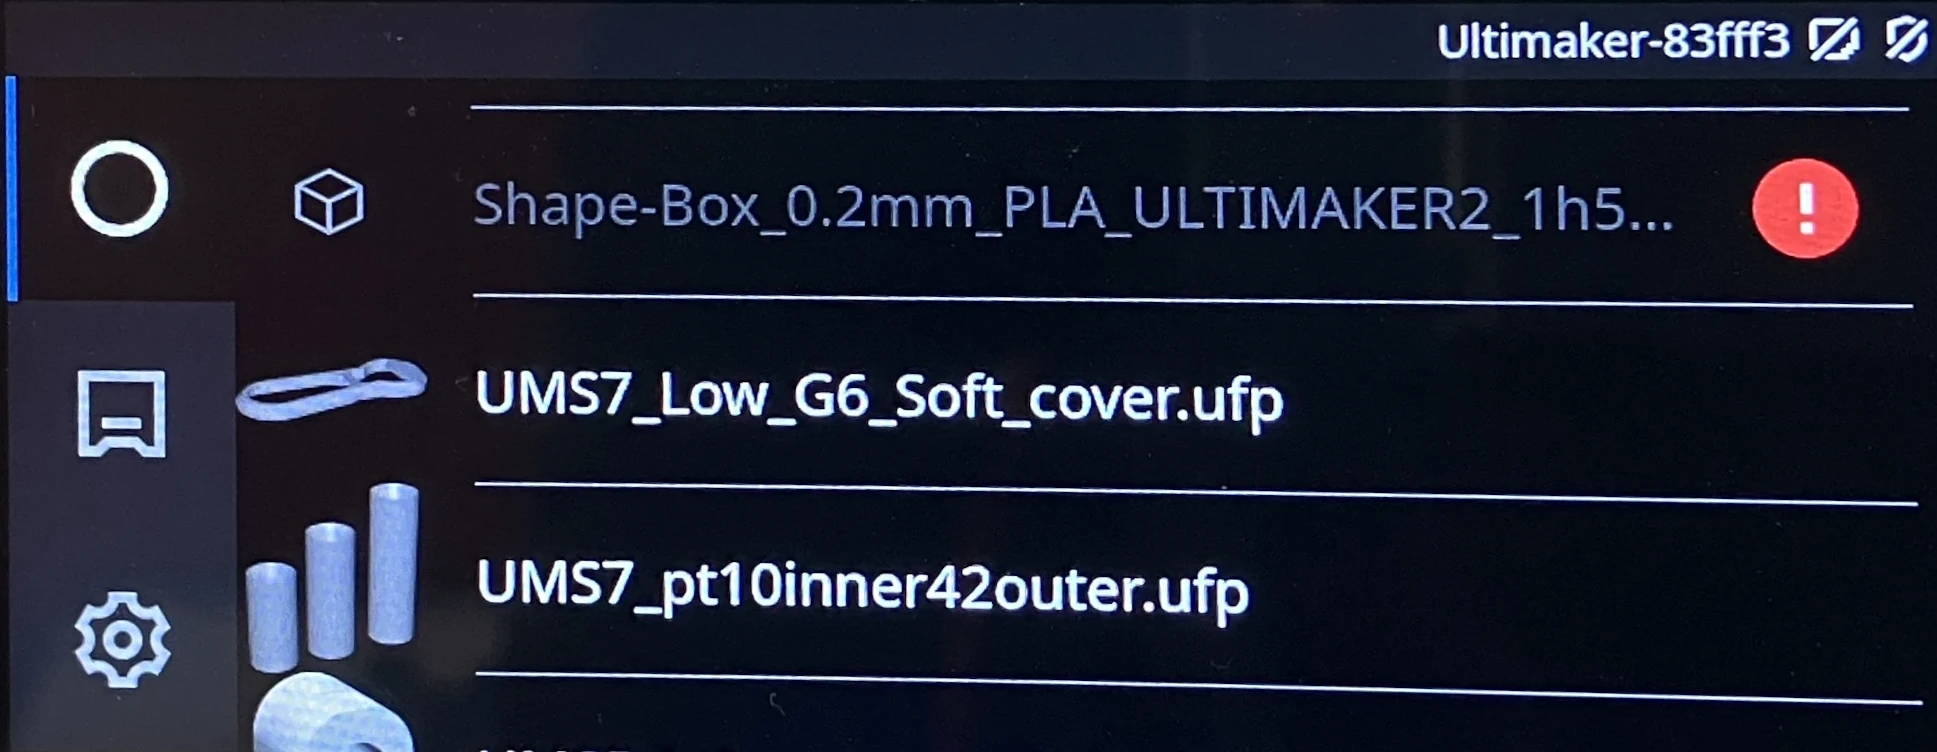
The G-code file is grayed out in the print file list on the printer with a red symbol next to it.
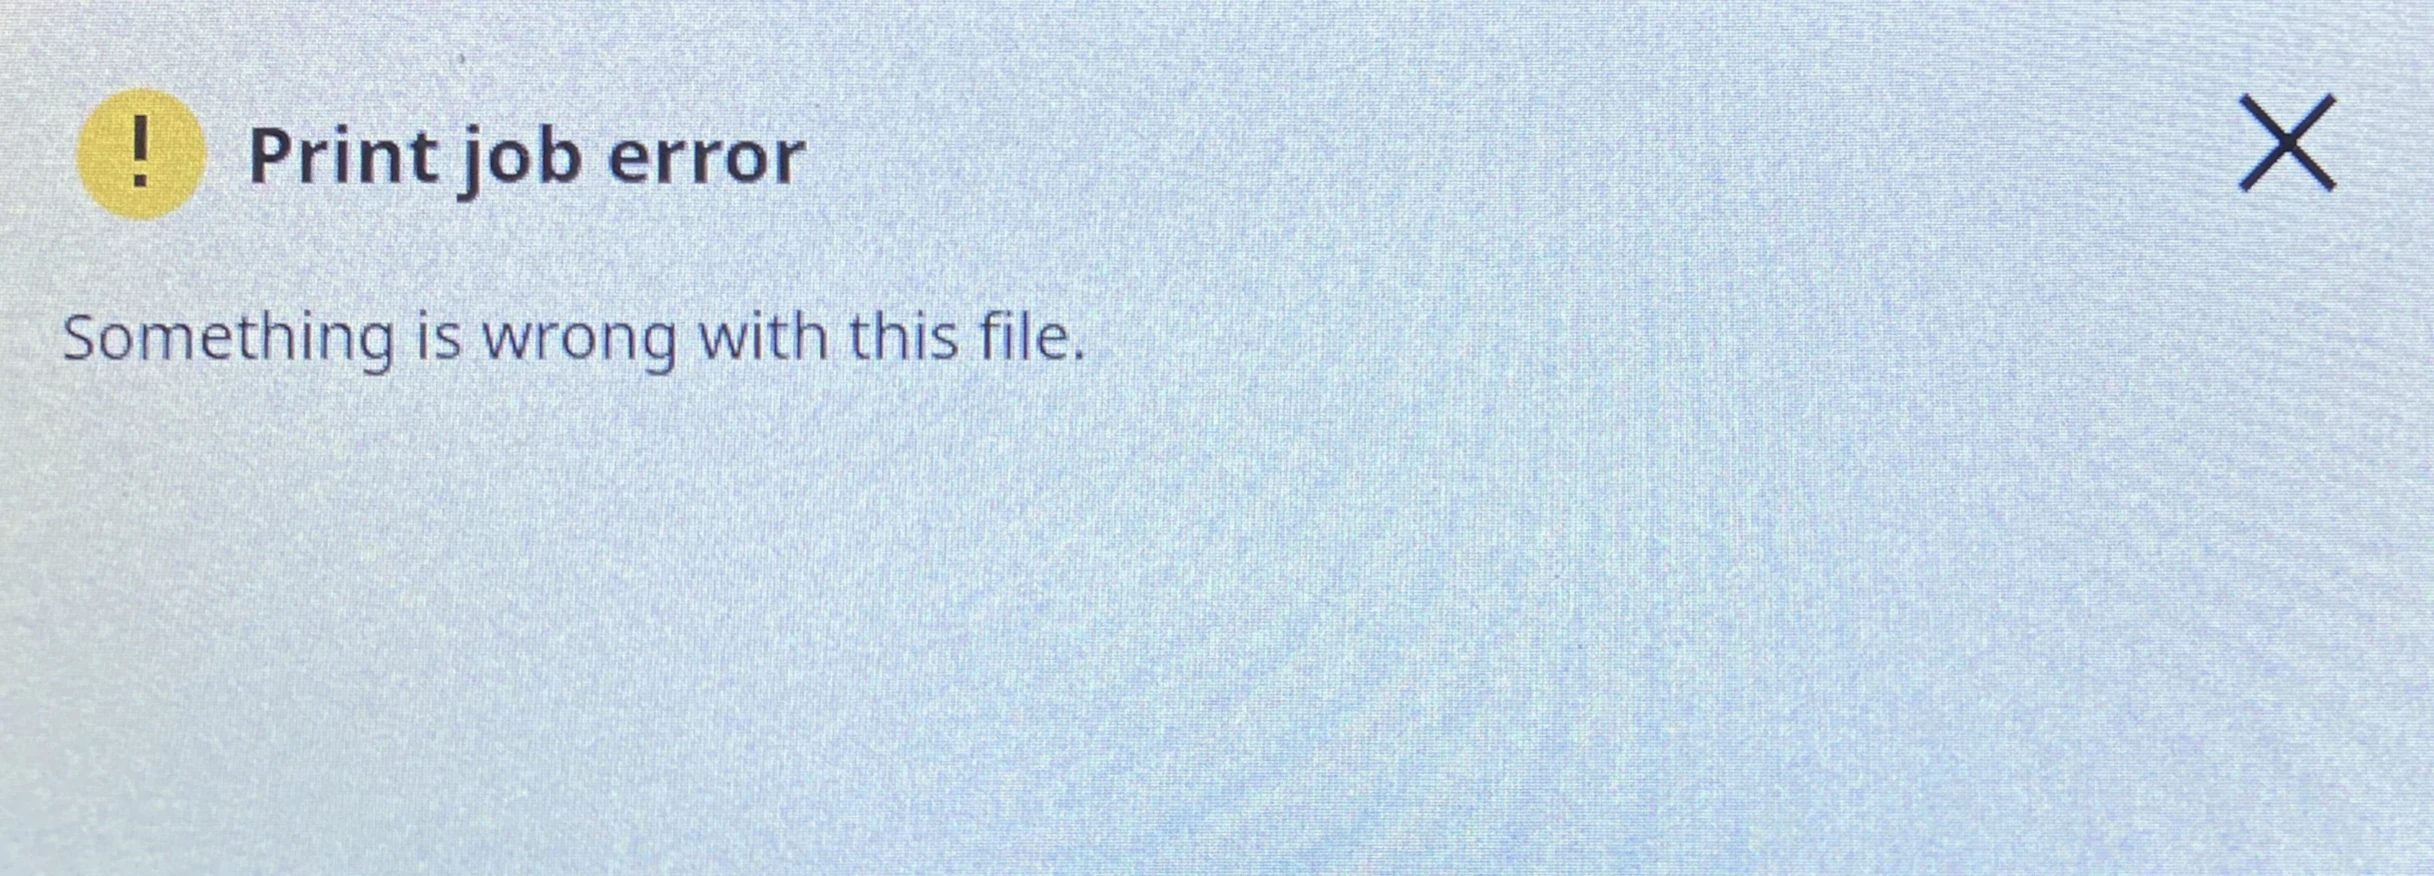
The printer will refuse to print the G-code file when sliced and say that the file has an “error” with no other specific information.
Griffin header
G-code comes in multiple flavors because machine firmwares support different capabilities and commands. Most 3D printers support the standard Marlin G-code commands. Ultimaker created a new G-code flavor based on Marlin called Griffin that has 2 main differences:
- G-code header with print metadata
;START_OF_HEADER
;HEADER_VERSION:0.1
;FLAVOR:Griffin
;GENERATOR.NAME:PrusaSlicer
;GENERATOR.VERSION:5.4.0
;GENERATOR.BUILD_DATE:{year}-{month}-{day}
;TARGET_MACHINE.NAME:Ultimaker S7
;EXTRUDER_TRAIN.0.INITIAL_TEMPERATURE:{first_layer_temperature[0]}
;EXTRUDER_TRAIN.0.MATERIAL.VOLUME_USED:{extruded_volume[0]}
;EXTRUDER_TRAIN.0.MATERIAL.GUID:0f12978a-8e3c-4147-b9ca-726d5ed59368
;EXTRUDER_TRAIN.0.NOZZLE.DIAMETER:{nozzle_diameter[0]}
;EXTRUDER_TRAIN.0.NOZZLE.NAME:AA {nozzle_diameter[0]}
;EXTRUDER_TRAIN.1.INITIAL_TEMPERATURE:{temperature[1] + standby_temperature_delta}
;EXTRUDER_TRAIN.1.MATERIAL.VOLUME_USED:{extruded_volume[1]}
;EXTRUDER_TRAIN.1.MATERIAL.GUID:0f12978a-8e3c-4147-b9ca-726d5ed59368
;EXTRUDER_TRAIN.1.NOZZLE.DIAMETER:{nozzle_diameter[0]}
;EXTRUDER_TRAIN.1.NOZZLE.NAME:AA {nozzle_diameter[0]}
;BUILD_PLATE.INITIAL_TEMPERATURE:[first_layer_bed_temperature]
;BUILD_VOLUME.TEMPERATURE:28
;PRINT.TIME:0
;PRINT.GROUPS:1
;PRINT.SIZE.MIN.X:{print_bed_min[0]}
;PRINT.SIZE.MIN.Y:{print_bed_min[1]}
;PRINT.SIZE.MIN.Z:0
;PRINT.SIZE.MAX.X:{print_bed_max[0]}
;PRINT.SIZE.MAX.Y:{print_bed_max[1]}
;PRINT.SIZE.MAX.Z:{max_print_height}
;SLICE_UUID:32daaf1d-f868-4a8e-ad06-8536b153e789
;END_OF_HEADER
- Reduced G-code command set supported. Compared to standard Marlin G-code, the notables changes are:
G28/G29homing and bed leveling replaced byG280.M82/M83gone. Relative extrusion support removed.G2/G3gone. No arc movement.
Daid’s Ultimaker forum post states that the below are the supported commands in the S-line printers.
G0, G1, G4, M104, M109, M140, M190, M106, M107, M201, M204, M205, M302, M400, M117
Creating our own header
The Ultimaker S-line printer expects any G-code file to have the proper header as comments and movements to use absolute positioning. We can configure PrusaSlicer to autogenerate a valid header as part of the printer start G-code just like Cura.
If you want to see a valid header, you can slice a file in Cura and save a file as G-code format instead of UFP by changing the save file type to G-code when choosing the Save to Disk option.
Header start
;START_OF_HEADER
; Printer_Settings_ID: [printer_settings_id]
Starts the header. We add the PrusaSlicer [printer_settings_id] like other PrusaSlicer profiles’ start G-code for consistentcy.
Generator info
;HEADER_VERSION:0.1
;FLAVOR:Griffin
;GENERATOR.NAME:PrusaSlicer
;GENERATOR.VERSION:5.4.0
;GENERATOR.BUILD_DATE:{year}-{month}-{day}
Slicer software information.
The Ultimaker S-line firmware uses the GENERATOR.VERSION field to compare against has a hard coded minimum version to warn about a lower Cura version. The provided version must have more than two decimal points if it consists only of numbers to avoid a crash due to being interpreted as an actual number.
Target Machine info
;TARGET_MACHINE.NAME:Ultimaker S7
I assume the Ultimaker printer could use this warn the user that the file was sliced for another printer model and possibly refuse to print it.
Temperature and Extruder Information
;EXTRUDER_TRAIN.0.INITIAL_TEMPERATURE:{first_layer_temperature[0]}
;EXTRUDER_TRAIN.0.MATERIAL.VOLUME_USED:{extruded_volume[0]}
;EXTRUDER_TRAIN.0.MATERIAL.GUID:0f12978a-8e3c-4147-b9ca-726d5ed59368
;EXTRUDER_TRAIN.0.NOZZLE.DIAMETER:{nozzle_diameter[0]}
;EXTRUDER_TRAIN.0.NOZZLE.NAME:AA {nozzle_diameter[0]}
;EXTRUDER_TRAIN.1.INITIAL_TEMPERATURE:{temperature[1] + standby_temperature_delta}
;EXTRUDER_TRAIN.1.MATERIAL.VOLUME_USED:{extruded_volume[1]}
;EXTRUDER_TRAIN.1.MATERIAL.GUID:0f12978a-8e3c-4147-b9ca-726d5ed59368
;EXTRUDER_TRAIN.1.NOZZLE.DIAMETER:{nozzle_diameter[0]}
;EXTRUDER_TRAIN.1.NOZZLE.NAME:AA {nozzle_diameter[0]}
;BUILD_PLATE.INITIAL_TEMPERATURE:[first_layer_bed_temperature]
;BUILD_VOLUME.TEMPERATURE:28
The G280 command combines homing and bed leveling into a single command.
Homing a single or combination of axes in Marlin is done with G28 and bed leveling is initiated with G29. It is up to the user to add additional G-code to preheat the bed and nozzles during the homing and bed leveling process.
G280 uses the header values for preheating the bed and nozzles during the homing and bed leveling procedure.
We fill these numbers in using PrusaSlicer’s feature to insert variables into G-code.
You can create your own material GUIDs by creating a custom material in Cura and copying the GUID from the generated G-code file. The header GUID is used to know if the official Ultimaker materials are used if the GUIDs match.
Printing time and volume info
;PRINT.TIME:0
;PRINT.GROUPS:1
;PRINT.SIZE.MIN.X:{print_bed_min[0]}
;PRINT.SIZE.MIN.Y:{print_bed_min[1]}
;PRINT.SIZE.MIN.Z:0
;PRINT.SIZE.MAX.X:{print_bed_max[0]}
;PRINT.SIZE.MAX.Y:{print_bed_max[1]}
;PRINT.SIZE.MAX.Z:{max_print_height}
Print volume information. This info is probably unused because G280 dynamically calculates the print volume for adaptive bed leveling using the points on the first and second layers.
Slice UUID
;SLICE_UUID:32daaf1d-f868-4a8e-ad06-8536b153e789
A UUID to identify a sliced file. It’s not used so any UUID can be used.
Header end
;END_OF_HEADER
Signifies the end of the header.
Start G-code
What we normally consider start G-code will follow the header. This normally involves commands in the order:
- Preheat and wait for bed to reach first layer temperature -
M140 - Preheat nozzles to standby temperature -
M109 - Home XYZ axes -
G28 - Bed leveling (if bed leveling equipment is installed) -
G29 - Heat nozzles to printing temperature -
M109 - Prime nozzles with a blob or line -
G0/G1 - Move to start position -
G0
Preheating the bed and nozzle before homing and leveling is recommended because the printer parts may expand due to being heated up.
As mentioned before, G280 handles preheating, homing, leveling, and priming on the Ultimaker S-line printer.
A prime line on the edge of the bed is more reliable than a prime blob in in the air. We can add S1 on the same line after G280 to disable the automatic prime blob.
A simplified start G-code routine for the Ultimaker S-line is:
- Preheat, home, and level -
G280 S1 - Heat nozzles to printing temperature -
M109 - Prime nozzles with a line -
G0/G1 - Move to start position -
G0
You must prime at least the retract_length_toolchange distance of filament to ensure that the filament is at a known position at the beginning of the print. retract_length_toolchange is the length of filament retraction when switching nozzles. When a new print is started, the filament position in the extruder train is unknown. It is between 0 (the nozzle tip) and retract_length_toolchange distance retracted into the extruder.
Some users may say that this can be solved by the skirt/brim/prime tower but they often do not understand the cause of this problem which is the initial unknown location of filament. If you do not ensure a known position for the filament at the beginning of the print for both nozzles, you will encounter underextrusion the first time each nozzle is used which is NOT guaranteed to be masked during the skirt/brim/prime tower. The second or third nozzle may not be used until a much higher layer in the print and the skirt and prime tower may not have enough volume to move the filament by retract_length_toolchange distance.
You can probably see how this leads to unavoidable oozing or underextrusion when the slicer assumes filament in all nozzles start at 0 distance (at the nozzle tip).
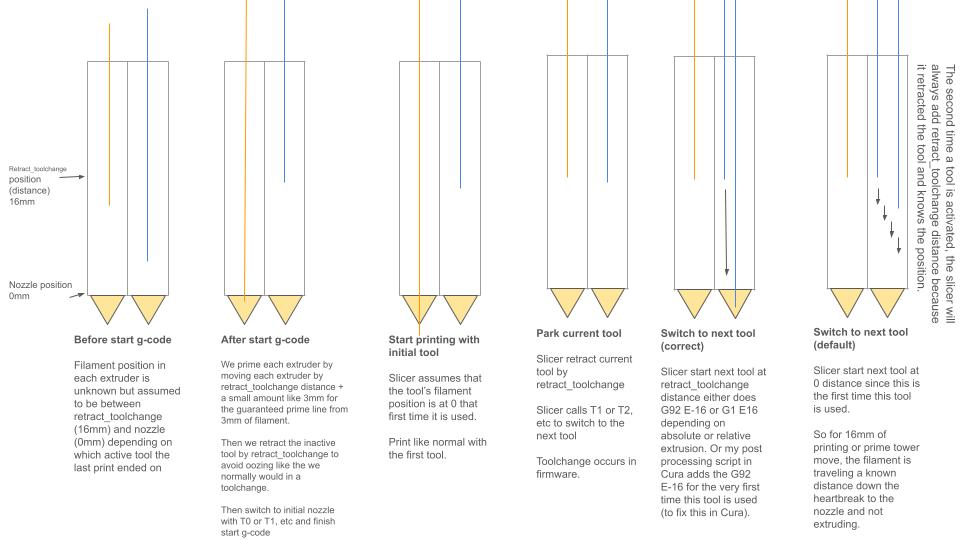
Cura is unaware of the filament start position at the end of your start G-code and you need to retract your filament some distance to prevent oozing. I created a Cura post processing script SetInitialSwitchedExtruderOffset to set the correct filament distance the first time a nozzle is used.
Putting it all together
A final working start G-code for the Ultimaker S5/S7 with Griffin header and prime lines for both nozzles:
; Delete the first 'generated by PrusaSlicer' line to make gcode printable on Ultimaker S-line

;START_OF_HEADER
; Printer_Settings_ID: [printer_settings_id]

;ULTIMAKER GRIFFIN HEADER
;HEADER_VERSION:0.1
;FLAVOR:Griffin
;GENERATOR.NAME:PrusaSlicer
;GENERATOR.VERSION:5.4.0
;GENERATOR.BUILD_DATE:{year}-{month}-{day}
;TARGET_MACHINE.NAME:Ultimaker S7
;EXTRUDER_TRAIN.0.INITIAL_TEMPERATURE:{first_layer_temperature[0]}
;EXTRUDER_TRAIN.0.MATERIAL.VOLUME_USED:{extruded_volume[0]}
;EXTRUDER_TRAIN.0.MATERIAL.GUID:0f12978a-8e3c-4147-b9ca-726d5ed59368
;EXTRUDER_TRAIN.0.NOZZLE.DIAMETER:{nozzle_diameter[0]}
;EXTRUDER_TRAIN.0.NOZZLE.NAME:AA {nozzle_diameter[0]}
;EXTRUDER_TRAIN.1.INITIAL_TEMPERATURE:{temperature[1] + standby_temperature_delta}
;EXTRUDER_TRAIN.1.MATERIAL.VOLUME_USED:{extruded_volume[1]}
;EXTRUDER_TRAIN.1.MATERIAL.GUID:0f12978a-8e3c-4147-b9ca-726d5ed59368
;EXTRUDER_TRAIN.1.NOZZLE.DIAMETER:{nozzle_diameter[0]}
;EXTRUDER_TRAIN.1.NOZZLE.NAME:AA {nozzle_diameter[0]}
;BUILD_PLATE.INITIAL_TEMPERATURE:[first_layer_bed_temperature]
;BUILD_VOLUME.TEMPERATURE:28
;PRINT.TIME:0
;PRINT.GROUPS:1
;PRINT.SIZE.MIN.X:{print_bed_min[0]}
;PRINT.SIZE.MIN.Y:{print_bed_min[1]}
;PRINT.SIZE.MIN.Z:0
;PRINT.SIZE.MAX.X:{print_bed_max[0]}
;PRINT.SIZE.MAX.Y:{print_bed_max[1]}
;PRINT.SIZE.MAX.Z:{max_print_height}
;SLICE_UUID:32daaf1d-f868-4a8e-ad06-8536b153e789
;END_OF_HEADER
T0
M82 ;absolute extrusion mode

G21 ; metric values
G90 ; absolute positioning
M107 ; start with the fan off

M140 S{first_layer_bed_temperature[initial_extruder]} ; start bed heating

G28 ; home if supported
G1 X1 Y6 F15000 ; move X/Y to start position
G1 Z35 F9000 ; move Z to start position

M104 S{temperature[initial_extruder] + standby_temperature_delta} ; heat nozzle

G280 S1 ; ultimaker home

;To skip adaptive bed mesh probing uncomment G0 commands before ;LAYER:1
;G0 X{print_bed_min[0]} Y{print_bed_max[1]}
;G0 X{print_bed_min[0]} Y{print_bed_min[1]}
;G0 X{print_bed_max[0]} Y{print_bed_min[1]}
;G0 X{print_bed_max[0]} Y{print_bed_max[1]}
;LAYER:1

; purge retract_length_toolchange due to unknown state
; prime extruders next to each other to verify extruder offset calibration

; prime T0
M104 S{first_layer_temperature[0]} T0 ; start heat nozzle temperature
T0
M109 S{first_layer_temperature[0]} T0 ; wait for nozzle temperature
G90
M82
G0 X5 Y100 Z0.3 F7200
G92 E0
G1 X5 Y10 E1.9 F1000
G0 X5 Y1 Z0.3 F7200
G92 E0
G1 X{print_bed_max[0]-30} Y1 E5.553 F1000
G0 X{print_bed_max[0]-30} Y1.5 F7200
G92 E0
G1 X10 Y1.5 E5.458 F1000
G0 X10 Y1.9 F7200
M104 S{temperature[initial_extruder] + standby_temperature_delta} ; cool nozzle
M104 S{first_layer_temperature[1]} T1 ; start heat next nozzle temperature
G92 E0
G1 X{print_bed_max[0]-28} Y1.9 E5.489 F1000
G92 E0
G1 E-3.5 F1200
G0 X{print_bed_max[0]-20} Y3 F18000
G0 X{print_bed_max[0]-15} Y10 Z3 F2400

G0 X30 Y10 Z0.3 F7200
G92 E0
G1 E3.5 F1200
G92 E0
G0 Y110 E1.85 F1000
G92 E0
G1 E-{retract_length_toolchange[0]} F1200
G0 Y150 F18000
G0 Y{print_bed_max[1]} Z5 F18000

; prime T1
T1
M109 S{first_layer_temperature[1]} T1 ; wait for nozzle temperature
G90
M82
G0 X5 Y100 Z0.3 F7200
G0 Y10 E1.9 F1000
G0 Y2.5 F7200
G92 E0
G1 X{print_bed_max[0]-30} Y2.5 E5.553 F1000
G0 X{print_bed_max[0]-30} Y2.9 F7200
G92 E0
G1 X10 Y2.9 E5.458 F1000
G0 X10 Y3.3 F7200
M104 S{temperature[1] + standby_temperature_delta} ; cool nozzle
M104 S{first_layer_temperature[initial_extruder]} ; start heating initial nozzle
G92 E0
G1 X{print_bed_max[0]-28} Y3.3 E5.489 F1000
G92 E0
G1 E-3.5 F1200 ;retract just a little because we don't have a way to tell the slicer T1 filament position when it starts printing from E0
G0 X{print_bed_max[0]-20} Y5 F18000
G0 X{print_bed_max[0]-15} Y15 Z3 F2400

;minus extruder1 offset X 22 which macro is not supported in start gcode
G0 X{30+nozzle_diameter[1]-22} Y15 Z0.3 F7200
G92 E0
G1 E3.5 F1200
G92 E0
G0 Y115 E1.85 F1000
G92 E0
G1 E-3.5 F1200
G0 Y150 F18000
G0 Y{print_bed_max[1]} Z5 F18000

; switch to initial nozzle
T{initial_extruder}
M109 S{first_layer_temperature[initial_extruder]} ; wait for nozzle temperature
G0 X{print_bed_max[0]-30} Y5 Z10 F7200
G0 X25 Y10 Z5
G0 X25 Y20 Z0.3
M82 ;absolute extrusion mode
G92 E0
G1 Y30 E{retract_length_toolchange[initial_extruder]} F1200 ;prime to set filament location for prusaslicer generated initial retract
G92 E0

;END of start gcode
This is more or less the same start G-code that I included in the PrusaSlicer profile for Ultimaker S-line.
Note: The Ultimaker S3 has a smaller bed size than the S5/S7 so I have created a modified prime line routine for it in the released PrusaSlicer profile.
Dual Nozzle Priming
After homing and leveling with G280 S1 I added 2 sets of prime lines to prime at least \((2.85mm/2) ^ 2 * \pi * retract\_length\_toolchange[N]mm\) of material from each nozzle. 16mm is the default retract on toolchange length for the Ultimaker. This ensures that the filament is at a known position at the end of the prime routine.
Both nozzles are primed next to each other so that you can visually verify that the extruder offset for the second nozzle is set correctly. 22mm is the default second extruder X offset for the Ultimaker S-line dual nozzle printhead.
Ultimaker S-line firmware does not automatically apply extruder X/Y offsets to coordinates 😤 so PrusaSlicer must be set up to add/subtract extruder offsets to all coordinates when the active extruder is not the first extruder. PrusaSlicer does not allow start G-code variables to access the extruder offset so these values are currently hardcoded into the start G-code prime routine.
Toolchange G-code
Ultimaker firmware automatically adjusts the Z-offset to match the active extruder Z offset when TXX is called with XX being the active extruder index.
I have modified the toolchange Gcode in the PrusaSlicer Ultimaker S-line printer profile to perform a Z-lift by moving the bed down for safety at the start of each toolchange to prevent nozzle collisions from new Z-offset that is instantly applied. Collisions may occur if the new active nozzle has a lower Z-offset relative to the old nozzle.
Required Post Processing - 🫵Yes — you, the user — read this!
PrusaSlicer adds the below header line to every exported G-code file:
;generated by PrusaSlicer
You must manually remove this line or any similar auto added line that comes before the actual start G-code because the Ultimaker S-line firmware will check for this line and say that G-code file cannot be printed because it contains an “error”.
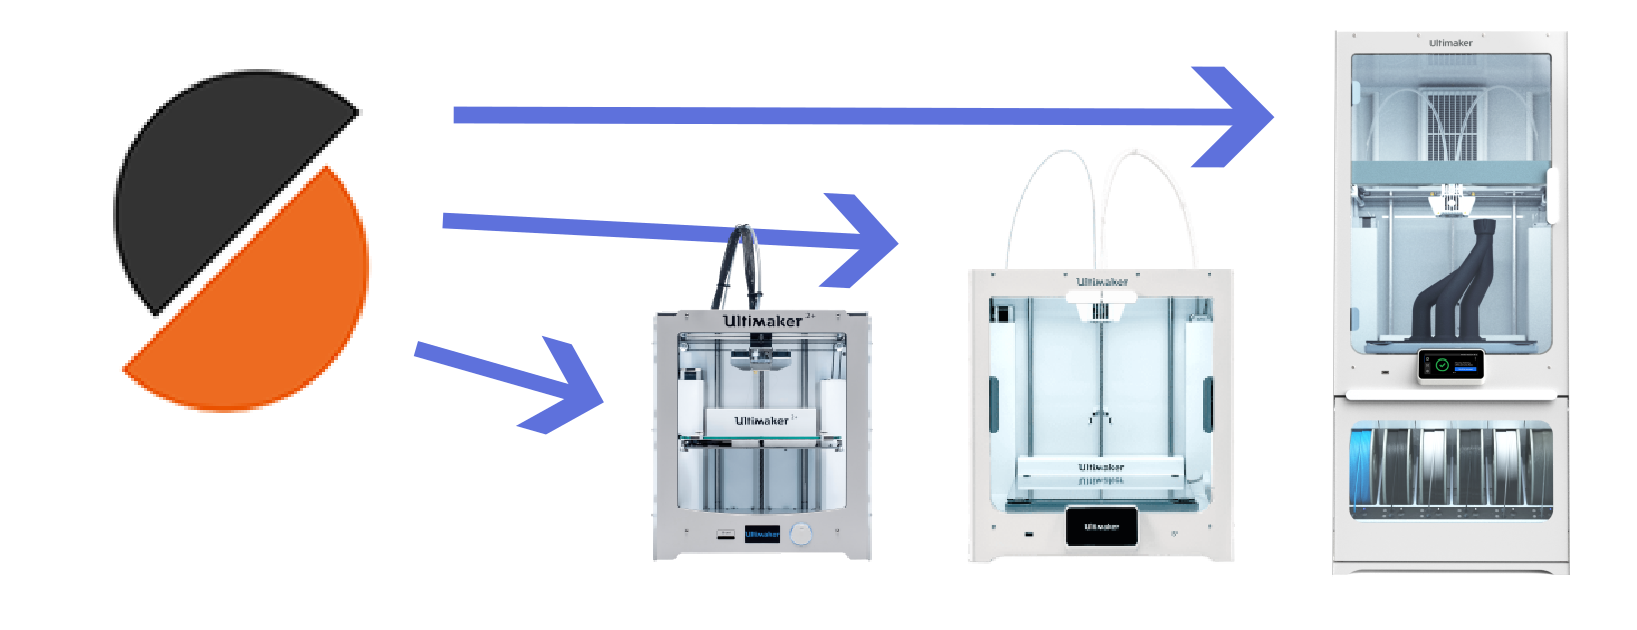
The Merging Is Complete
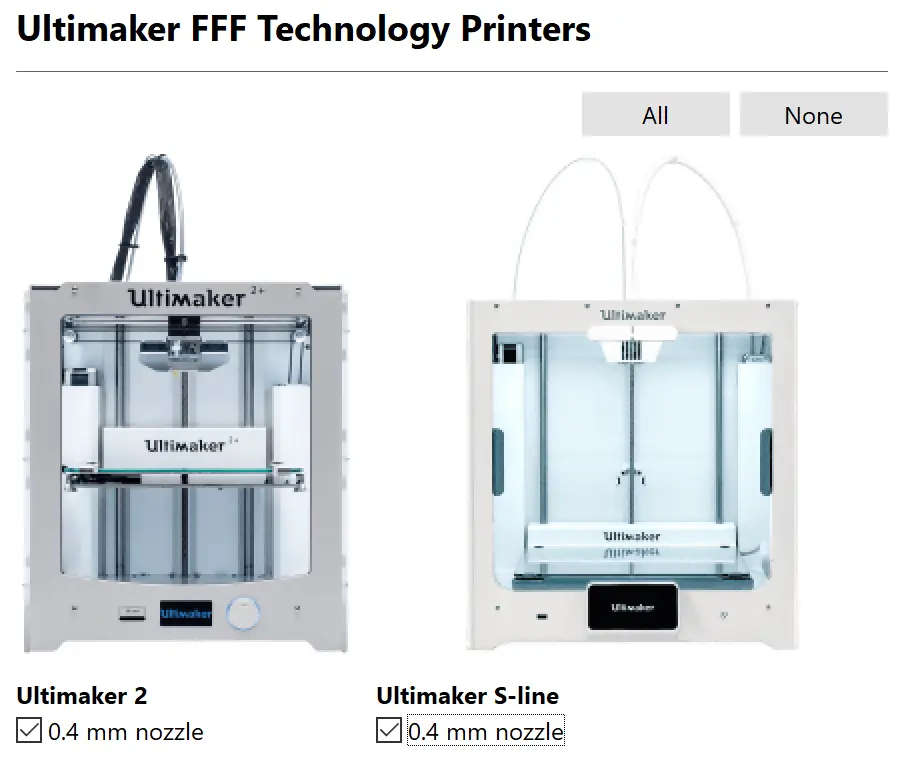
This new Ultimaker printer profile keeps all the Ultimaker printers including the existing Ultimaker 2 in the old profile under a single unified profile. Some print profile settings values were updated to reflect current recommended official Ultimaker Cura values that I got good results from. I also added the Ultimaker DXUv2 dual nozzle mod as an available printer variant inheriting from the Ultimaker 2 settings.
Ultimaker S3, S5, and S7 are selectable under a single printer model of Ultimaker S-line because the mechanics and firmwares of these cartesian printers is almost identical and the same goes for the print settings. The main differences between the S-line printers are summarized below:
| Model | Print Volume | Buildplate Material |
|---|---|---|
| Ultimaker S3 | 230 x 190 x 200 mm | Glass |
| Ultimaker S5 | 330 x 240 x 300 mm | Glass |
| Ultimaker S7 | 330 x 240 x 300 mm | PEI coated spring metal |
I submitted my Ultimaker S-line (S3/S5/S7) printer profiles to the Prusa/PrusaSlicer-settings GitHub repo and the Prusa team reviewed and merged the update about a month later.
A PrusaSlicer version ≥ 2.6.0 is needed to use the Ultimaker S-line (S3/S5/S7) printer profile.
If you have an Ultimaker S3/S5/S7 3D printer and are feeling adventurous, take the new PrusaSlicer support for Ultimaker S-line printers out for a spin!
A fun visual test could be using some PrusaSlicer specific surface patterns that are not available in Cura.
Limitations
Due to slicer and printer limitations, the new Ultimaker S-line profile has some special limits to keep in mind.
- The extruder offset is hardcoded into the start-Gcode.
- Time estimates are not available.
- No thumbnail support.
- No real GUID creation for materials. You can copy GUIDs from Cura sliced G-code if needed but the GUID does not affect the actual printing.
- No binary G-code support. You must save G-code as ASCII.
Z-lift/Wipe on Retract Travel
PrusaSlicer enables Z-lift on Retract which raises the nozzle slightly after retraction and before traveling to a new location. I believe that Ultimaker has not defaulted to enabling Z-lift on Retract because the Ultimaker printer bed is only being held up on one side. This cantilevered bed design sags down on the unsupported side (the front) and is more susceptible to vibration from bed movement. In my limited testing, the PrusaSlicer style Z-lift on Retract does not decrease print quality when used on the Ultimaker S7.
