Keep using Adobe Creative Suite (CS) after upgrading your host machine past macOS Mojave 10.14.
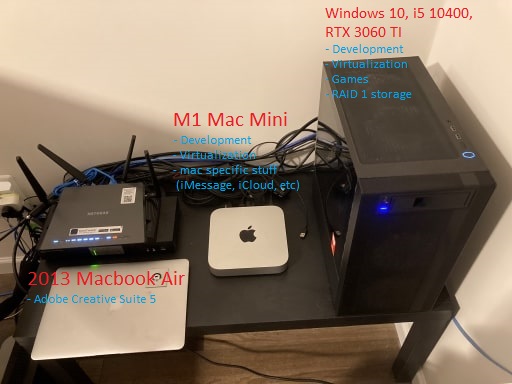
I purchased Adobe CS5 for OS X a decade ago and have been keeping around an older Apple computer to use it for graphic and photo editing. macOS versions newer than macOS Mojave 10.14 will not run 32-bit applications such as the Adobe CS5 suite. An accidental macOS upgrade requires a clean reinstall to get Adobe CS5 running again which is a hassle.
I’ve already paid for CS5 and don’t need the newer Adobe Creative Cloud (CC) features or the monthly subscription cost which is actually really expensive if you are not using it everyday!
Constantly switching 3 DisplayPort displays with a KVM between a Windows 10/new Mac/old Mac (the Adobe CS5 machine) also rearranges visible windows in my main Windows 10 workstation which is unfortunate. Windows 10 does not remember which display your windows were in when multiple displays are reconnected while macOS does remember to restore the windows correctly.

My IOGear (a rebranded ATEN) KVM doesn’t have full time DP DDM support and I haven’t made the plunge to buy a ConnectPro DP KVM which claims to support full time DP DDM emulation. 💸
The newer CS6 has a couple applications which are 64-bit. However some components used by CS6 are 32-bit and I’ve read that CS6 has also stopped working with the newest macOS.
It took me a while before I thought of a solution: Run the older version of macOS in a virtual machine and run Adobe CS5 inside that virtual machine!
After some trial and error here are the steps:
-
Download Virtual Box for your host machine. Ex: Use the newer macOS install as the host.
-
Download the macOS High Sierra 10.13 or Mojave 10.14 DMG from Apple on an existing installation of macOS and then convert the DMG to ISO with Disk Utility OR download a premade VMDK from Geekrar. Many steps in this post are from Geekrar but there are some additions to fix the final display resolution.
-
Create a new guest virtual machine in Virtual Box and select the ISO as the inserted CD or the VMDK as the storage device.
-
Set processor count to 4.
-
Set memory to 8192mb.
-
Set video memory to 128mb.
-
Quit VirtualBox. Run the below VBoxManage commands in Powershell or equivalent terminal after navigating to the VirtualBox installation directory. Replace
VMNAMEwith the name of your new virtual machine in Virtual Box.
cd "C:\Program Files\Oracle\VirtualBox\"

.\VBoxManage.exe modifyvm "VMNAME" --cpuidset 00000001 000106e5 00100800 0098e3fd bfebfbff
.\VBoxManage setextradata "VMNAME" "VBoxInternal/Devices/efi/0/Config/DmiSystemProduct" "iMac11,3"
.\VBoxManage setextradata "VMNAME" "VBoxInternal/Devices/efi/0/Config/DmiSystemVersion" "1.0"
.\VBoxManage setextradata "VMNAME" "VBoxInternal/Devices/efi/0/Config/DmiBoardProduct" "Iloveapple"
.\VBoxManage setextradata "VMNAME" "VBoxInternal/Devices/smc/0/Config/DeviceKey" "ourhardworkbythesewordsguardedpleasedontsteal(c)AppleComputerInc"
VBoxManage setextradata "VMNAME" "VBoxInternal/Devices/smc/0/Config/GetKeyFromRealSMC" 1

.\VBoxManage setextradata "VMNAME" VBoxInternal2/EfiGraphicsResolution 1920x1080
The last command sets the resolution to 1920x1080. I tried 4K 3840x2160 resolution but the lag was too great with the simulated VBox graphics controller.
-
Start your virtual machine.
-
If you have a 4K display and are using 1080p resolution for the virtual machine, scale the display with View > Virtual Screen 1 > Scale to 200% which will make each pixel in the virtual machine appear twice as large on the host display. It’s not real scaling but it’s the best solution I’ve found so far.
There may be 2 legal issues with this setup:
- You need to have purchased a copy of OS X — which you already fulfilled when you bought a physical Apple computer.
- The OS X software license agreement states that a single license may only be used on a “single Apple-labled computer at a time” which seems to refer to the hardware itself.
