After using an issued PC with an SSD at the academy and a Macbook Air with SSD for the past year, my mid-2011 iMac’s performance seemed sluggish. It didn’t help that the Seagate hard drive was probably one of the affected units but not covered by the iMac 1TB Seagate recall. According to the recall page’s online form, the iMac’s serial number isn’t covered.
![]()
I brought the iMac to an Apple Store last December and explained how my iMac was mid-2011, shipped with a 1TB Seagate hard drive, and thus should be covered by the recall. The Apple Store replaced it with a 1TB Western Digital hard drive ready for pickup next day so that should’ve been the end of sluggishness.
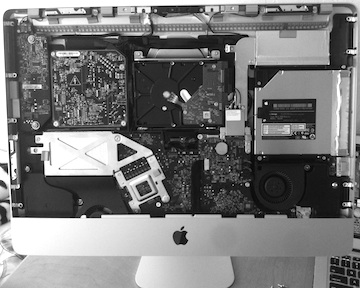
iMac with display removed
Using SSD equipped laptops most of the year (iMac stays at home), my expectations were probably too high when I came home on leave. iMac still seemed slow and froze when switching between applications. I had been thinking about an SSD upgrade for a while but never really took the initiative to actually order the parts and perform the upgrade. I ordered OWC’s iMac SSD DIY Kit and 240GB Mercury 6G SSD.
Note: The cost was under $200 with the free UPS SurePost shipping option at checkout. When I got my UPS tracking number, I upgraded the shipment through UPS My Choice to UPS Ground for $3.50 which I believe is less then selecting UPS Ground at checkout time. The description for the shipment states that upgraded shipments are usually delivered a day earlier. Upgrading the shipment did in fact move the scheduled delivery date earlier one day.
The kit arrived in a small box in the afternoon. Following OWC’s SSD install video, I was able to get the iMac opened up and the logic board slid out without any problems. The issues began when I connected the extra SATA data cable and put the logic board back into the base. The OWC provided SATA cable has a very “long” connector casing (the black part in-between the contacts and the red cable).
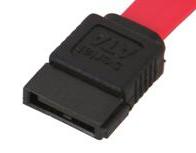
OWC’s SATA cable connector case was longer than the one shown above. The SATA port is horizontal, facing the back of the iMac. When putting the logic board back in place, there was too much resistance presumably due to the SATA cable touching the back face of the iMac so I substituted the provided cord for one of my own with a shorter casing much like the one displayed above. The provided SATA power cord fit without any problems. After spending about 2 hours struggling to reinsert the logic board, I put the iMac display back on and booted the computer using a USB drive formatted with the OS X Mavericks installer.
OWC’s video quoted a repair time of 75 minutes! Be prepared to spend double or triple that time if you haven’t opened up an iMac before. Unlike most PC interiors, the iMac’s innards were intricately arranged and there was little wiggle room when reassembling the computer.
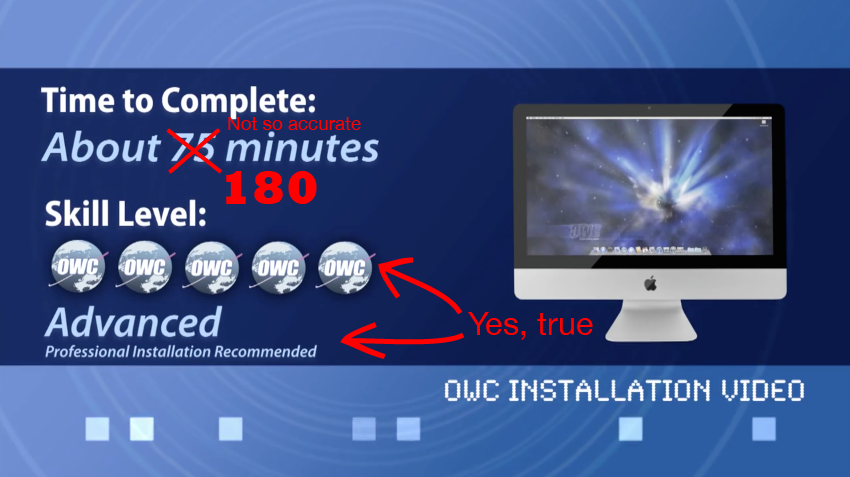
180 minutes, maybe… if you’re not so lucky?
When moving windows around during the OS X installation, I noticed ripples appearing at certain portions of the screen when moving windows. Uh oh, vsync or display port problem? Maybe I hadn’t plugged in the display cables all the way? I’ve haven’t seen ripples occur during an OS X install before. The ripples disappeared upon the completion of the install so I assume that OS X somehow reinstalled a driver that was somehow altered when I performed surgery on the iMac.
I install OS X onto the SSD and formatted the HDD for use as storage. I also moved my user home directory onto the HDD. When installing applications now, I just need to remember to select the HDD as the install location in order to use the increased storage. Performance has been snappy so far.
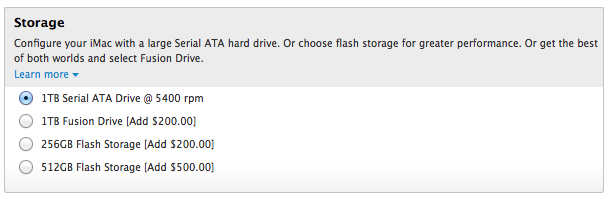
Apple Store iMac upgrade options
The Apple Store iMac upgrade price for a 256GB SSD is $200 and you can also choose their hybrid Fusion Drive for $200. In the recent years, Apple’s upgrade prices have lowered and gotten much more competitive.
Fusion Drive combines 128GB of superfast flash storage with a traditional hard drive.
The Fusion Drive isn’t a bad choice if one is buying a new iMac. It’s basically what I’ve installed, a 1TB HDD and 256 SSD crammed into an automated package. Neither is the provided $200 SSD upgrade, although you do lose the 1TB HDD in the selection process.
I’ve installed StarCraft II and Team Fortress 2 (TF2) onto the HDD and have experienced a few very brief (1-2 second) freezes with TF2 and SC2 so far, but gaming performance is much better now as well. Presumably the iMac was not designed to handle two interior drives.
For comparison, the iMac’s SATA 3.0 supports up to 6 Gb/s while the the Macbook Air’s SATA Express is listed in System Information as only supporting up to 5 GT/s which translates into 4 Gb/s; not that it would be easy to reach that bottleneck anyways.
