As my high school career comes to a close, I’ve thought of what to do as a customary prank.
Sure, I could put a desk on the roof or toilet paper the campus like previous years. But nothing strikes fear into this generation that is glued to their devices than the prospect of no internet.
Time to troll-on-the-go. Let’s snag some wifi and poison the DNS.
</center>
Pick a random track from the Spotify widget on the right — then read this.
My high school has a campus wide wireless network, we’ll call it wireless, that students use to access the web on their iPod Touches and Android phones.
The wireless network is unencrypted, so it makes our job easier. We can fool secured networks too, if the passphrase is known (which isn’t too hard these days).
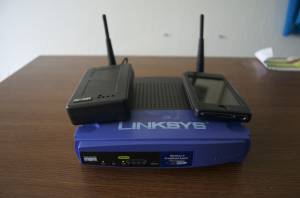
In order to make users go to our page, we need to pull them into our zone of control, our own wireless network. I purchased a Linksys WRT54G router off of the internet to create our own network. A WRT54G was used because it supports a wide array of custom firmwares. Try to get an older version of the router because those models have more RAM and do not use Linksys’s proprietary firmware as the newer versions do. I had to try out a few solutions before getting to the one below.
DISCLAIMER: I, Anson Liu, and Apparent Etch, are NOT responsible for any damage, injury, liability, or ANYTHING resulting from the following of the below. Proceed at your OWN risk. Use common sense.
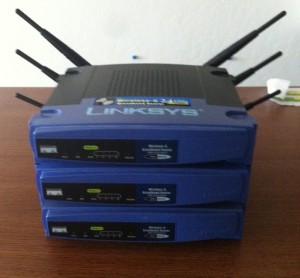 Install DD-WRT, an open source firmware for the router. DD-WRT allows us to change many settings not available with the stock firmware, including but not limited to Tx power (antenna power) and Virtual Access Points (VAP). Make sure to use an ethernet cable and static DHCP configuration when “updating” firmware. Typical DHCP configuration for flashing:
Device IP of 192.168.1.101
DNS mask of 255.255.255.0
Router IP of 192.168.1.1
If the connection is broken when flashing the firmware, you may end up with a bricked router — two for me, unfortunately.
Login to the web GUI with the username: root and password: admin.
Enable Boot Wait under Administration > Management so that you can restore the firmware over TFTP if something goes wrong. You will be thankful for it when you Google for revival strategies.
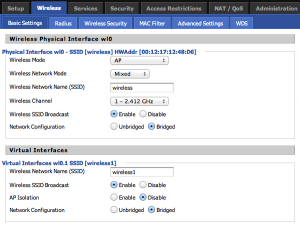
Under Wireless > Basic Settings change the SSID of the router’s wireless network to the target network’s name. In this case, it will be “wireless”. If you want to spoof multiple wireless networks, you can click “add” under Virtual Interfaces and create another VAP and rename the SSID, ex: wireless1. Now students will connect to our network if our router is closer to them and gets-to-them first.
Note: The router may still only broadcast one BSSID, the MAC address of the router. On iOS devices only one of the SSID’s will be shown under the Wifi option due to the single BSSID while the device still “sees” both SSIDs.
Sure they’ve connected, but how do we send them to our custom page? At first, I attempted to use existing captive portal software. For some reason, the all the existing solutions require internet to function which is a no-no because our Troll-on-the-go rig won’t be having — or needing an active internet connection as you will see.
Time to use DNSMasq, a DNS forwarder included in DD-WRT.
DNSMasq settings are found under Services > Services. Enable DNSMasq and enter address=/#/192.168.1.101 for Additional DNSMasq Options.
When visitors request a domain, the # specifies a wildcard and returns the IP address of the domain name. If a user requests google.com, it will tell the device that google.com has the IP address of 192.168.1.101. Naturally, the device trusts the router and assumes that google.com is at 192.168.1.101.
I was going to install a webserver on the router and have it listen on port 80 at the DNSMasq IP, but I could not get it to work. due in part to me not being able to configure the router correctly. Instead I used my 1st generation iPod Touch as a web server.
1. Install lighttpd using Cydia and SSH using Axis’ tutorial here.
Add server.error-handler-404 = “/error-handler.html” to the lighttpd.conf file to redirect requests to domains’ directories.
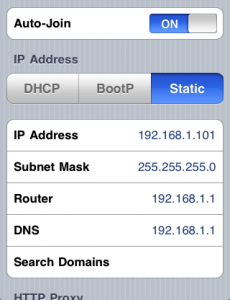 2. Set Static IP Address on the device while connected to router.
3. Create the folders /library/test/ and an HTML file within test named success.html under your lighttpd’s document root (default: /). You can edit the document root in the lighttpd.conf file located in /usr/local/.
A link to a working success.html file: HERE. You can view the page’s source and copy it over.
The reason for this file is that your router may not have an actual internet connection. As a result, iOS shows a web view upon connecting to the network. The web view tries to access http://apple.com/library/test/success.html. You must get to the page from that web view or iOS 3.1.3 will not let you do anything else on the network. So here, the both the iOS lighttpd server and victims’ devices will actually navigate to http://192.168.1.101/library/test/success.html due to the router’s DNSMasq options.
4. Create your custom page in lighttpd’s document root.
5. Install Insomnia from Cydia to keep the wifi connection between the router and lighttpd server active when the device is locked.
6. Start lighttpd with
/usr/bin/lighttpd-start >/dev/null &
and connect the device server to the router network.
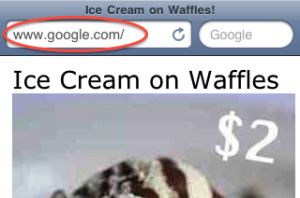
If all settings were configured correctly, users will now to redirected to your custom page. The above page was used to advertise foods during a club event.
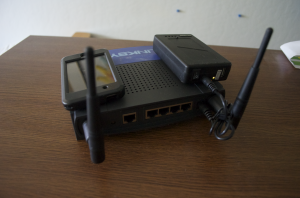
I have a 12V li-ion battery powering the router. The battery and iPod Touch are held in place by velcro. The battery has a lot of capacity so I would recommend it for other power needs. The last thing to do is get a better pair of antenna to reach devices further and more quickly.
Remember, exercise common sense and discretion. Only use the router when the owner and users of the premises have agreed to the use of this setup.
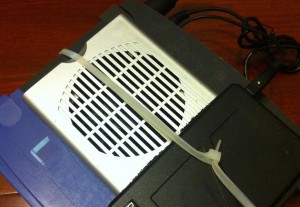
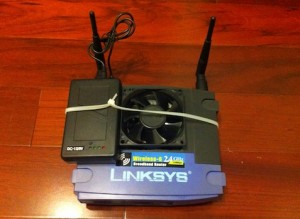
Third party firmwares such as DD-WRT, allow SSH access to the router and overclocking capability. I increased by router’s clock speed to 216Mhz. To combat overheating, I installed a computer fan into the router as shown below. I cut a square in the casing to fit the fan and used the same li-ion battery to power the fan. That battery has both an N-type power connector (for the router) and USB port; it is one of the most versatile and longest lasting batteries I have used.
My second try at cooling. This time I powered the fan through the router’s DC input pin and ring. I also put in a switch for the fan so the router can be used independently from the fan. The fan used in the below picture was an actual fan from a computer case whereas the first fan was a laptop cooling stand’s.
Hopefully this article will help you avoid using unencrypted wifi and make you more aware of SSID spoofing and DNS poisoning. “Spoof” sounds like such a harmless word but someone can be monitoring others’ connections and activities with the simple setup above and malicious intent.
No doubt the IEEE 802.11 standard will remain widely used for the next decade or so. This article will remain relevant for a while.
I just noticed, this is post 102 on the development blog.
Our first post, on iOS Safari webclips, was written back in August 2010. Check it out, it still applies to iOS now!

