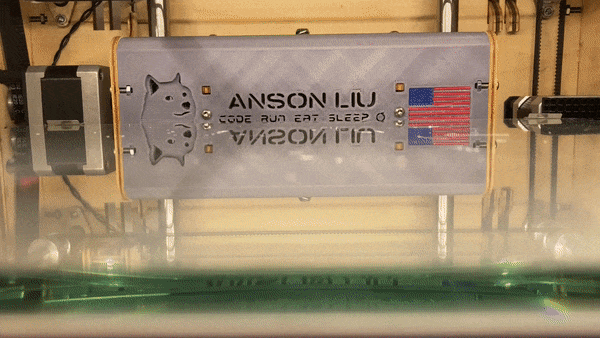
Custom Doge Ultimaker Original+ Bed Header in Thermochromatic PLA
Not the custom 3D printer part you need but the part you deserve.
The Doge and USA flag themed Ultimaker Original+ bed header.
But first…
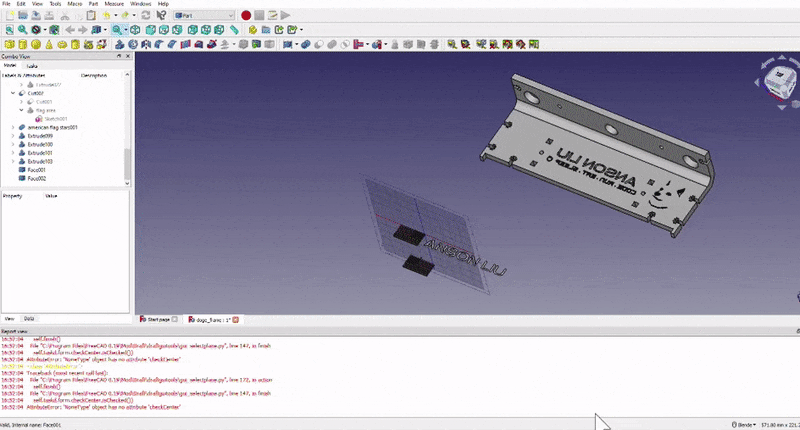
Adjusted a printable bed cover created by Neotko using FreeCAD.
In order to model the Doge on the surface of the cover, I imported an SVG drawing of a Doge head into FreeCAD and coverted the “head” outline into a 3d object. The face features were upgraded to separate 3d objects and subtracted from the head 3d object. I needed to adjust the dimensions of the SVG drawing in Inkscape through trial and error.
Printing finer than the nozzle resolution?!
The United States of America flag was created by doing a similar process on an imported SVG. The 50 stars were tricky. The Ultimaker Original+ has a nozzle size of 0.4mm and an accuracy of at least 0.05mm. The individual star features’ resolution was ~0.1mm. Instead of extruding the stars for printing, <0.4mm resolution by printing around the stars. Modeling the stars as voids in the models allowed me to print every star in higher quality.
Print it!
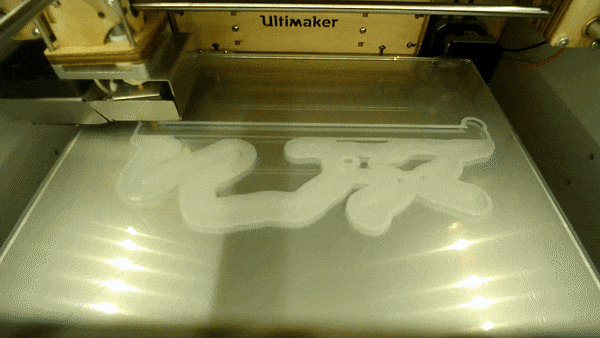
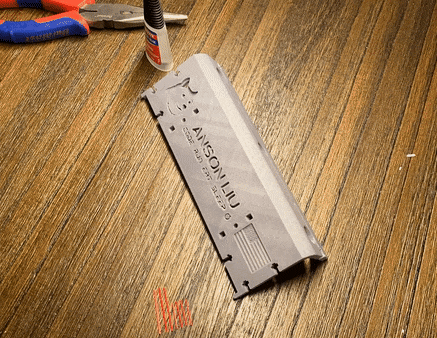
The print had to be positioned with the front facing up in order to print the angled Doge features without support material. I made the mistake of printing it with the front facing down on a test print and the Doge becomes a husky! The front face is very glossy and smooth when it is facing down, so I had to try to replicate the effect using ironing with the front facing up.
| My UMO+ Ironing Setting | Value |
|---|---|
| Pattern | Zig Zag |
| Line Spacing | 0.2 mm |
| Flow | 35% |
| Inset | 0.33 mm |
| Speed | 60 mm/s |
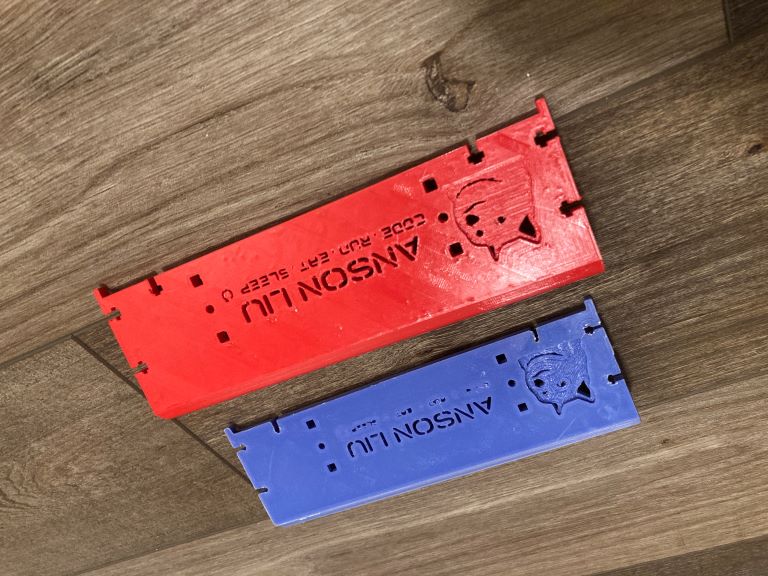
Blue print used color changing PLA with front facing down. Red print used normal PLA with front facing up w/ ironing.
I used Gizmo Dorks 2.85mm Gray-White Color Changing PLA filament to print the final bed cover. Coloring changing PLA feels more smooth and brittle than normal PLA so printing speed had to be kept relatively high (~60 mm/s) in order for the feeder gear to keep a grip on the filament and not wear/melt the filament.
Pop it!
The finished print was stuck tight to the glass bed due to the large brim area on the bottom. I placed the glass bed in the refridgerator for an hour and the print popped off with much less force.
Coloring the USA flag
I used the 3D model of the USA flag that I created previously and printed the corresponding parts in red and blue PLA. Super glue was used to fit the red and blue parts into printed notches on the bed cover. The white stars on the flag are more visible behind the blue background when the bed cover changes color from gray to a bright white!
Install it!
I installed the new bed cover in my Ultimaker Original+ which involved removing the entire bed platform and sliding rods.